Tuesday, 27 November 2012

UV Layout

Before exporting the base mesh into Zbrush I wanted to the UVs first, so I want have to worry about them later on when it comes to exporting the normal maps and making the textures.

To lay the UVs I used a program called UVLayout, which makes the process really fast and it's fun to do.

I didn't really worry about giving each polygon an equal UV space as I'm going to create textures using Photoshop and Bodypaint and they're going to work, no matter what the V space is.

However, a thing to consider was to get rid of any overlapping UVs. These can really create some problems later on.

Another thing to point out is the seams. You can't really get rid of them as you can with overlapping UVs, so I had to put them in the areas you are never going to see.


As I didn't really care about UV space, I quickly applied a checked texture to the model to see if there is any big stretching.


As you can see, there isn't any and the model is ready for Zbrush.

Base Mesh

Once I had the idea of how the fly is going to move, I began modelling a base mesh.

For me a base mesh is very important aspect of the pipeline. a good base mesh will make my life easier later on when sculpting in Zbrush or rigging and animating.

For this base mesh I began with blocking out the major shapes (the proxy mesh I created earlier was very helpful at this stage as I could just copy some elements and work on them, rather than making everything from scratch). Once the shape was ready I started adding more subdivisions. I had to be very concious about where I was putting the edges to match my design so the model will deform better in the animation process. Also having good edge flow helps in Zbrush as I won't have to subdivide to crazy levels to get detail I want.

Another important thing to point out is that every single polygon is quad and there are no more than 5 edges coming to a single point. That makes a base mesh very clean and sorts out all the problems that would happen later on in Zbrush.

To keep good edge flow and everything quads was a big puzzle and took a long time to figure out. But in the end I really enjoy that aspect of modelling as it makes you use logic and trains your brain.

One more thing to point out is I tried to keep the polygons as square as possible, even if I had to add some extra edges. Having square faces really makes sculpting in Zbrush smooth.

Here is a turntable of the final base mesh:


Sunday, 18 November 2012

Getting To Know My Character

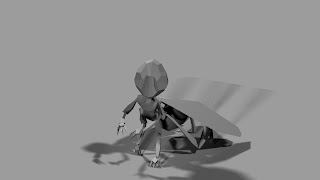
Having the image planes I still wasn't sure where to go with the character. I couldn't decide whether to make it bipedal or move like a real fly. So I made a very quick model and rig, which took me only an hour to make. Having it done I could get an idea of the 3d form of the Fly and I could easily experiment with different poses.

Here are few examples of possible posses:


All of them really helped me out. But to get even more from those poses, I decide to animate them.


First animation is just a test of the rig. I wanted to see if I can move every bit I want.

Then I moved to very fly-like animation. But instead of completely mimic a real fly, I wanted it to look intelligent. So I slowed the animation and gave the Fly some head movement to make it look like it's thinking.


After then, I made a bipedal walk cycle. It was quite tricky to work with four arms. I like this animation, but on the other hand I think it's too much like 'A Bugs Life'.


Then I focused on flying. But since during a fly nothing really happens except the wings flapping, I focused on starting and landing.


All of those test worked. But all of them wasn't any exciting. They were very dull and been done million times. And suddenly a got one more idea of a pose. the fly would use four limbs to walk and two limbs just like human's arms.


I also made an animation test of this pose and I love it! It's dynamic, original and gives countless possibilities of more movement.


Sunday, 4 November 2012

Orthographic Images

Once I chose the design it was time to work on orthographic images. I scanned the drawing and using Photoshop I started to work. The first thing to change was the pose of the character. On the drawing it's sitting, but in order to model and rig it it has to be standing up. Once I was changing the pose I also changed some of the design element, such as wings. They were too short in proportion to the whole creature and would be impossible to fly. Once I had the side view finished, I carefully made the front view. I had to use a lot of guides to keep it the same. Then I copied the front view and erased the inner lines, so all I had left was the outline. Then I could easily add the inner lines to have a back view.


Concept

For this project we have to make a 30 second film individually. I was thinking for a long time what to do. I really want to do VFX after I graduate but I also enjoy creating creatures. I was choosing between creating a creature or making a VFX piece. So in the end I've decided to make a creature and comp it into live action. To choose a creature I looked at my drawings in my sketchbook and chose one of them I think will be good for this project. I've chosen a humanoid fly. I think it will be the most challenging one to create. It has four arms, two legs and wings. The shader will be very glossy and and reflective. The wings will be transparent with some veins and there will be short hair all over the body.