https://vimeo.com/65820776
This is the link to the final film. Once I rendered the final sequences in Nuke, I used AfterEffects to put them all together. I also quickly created end credits on Photoshop and added it to the AfterEffects comp.
Once the film was done I took my time and created a breakdown of it in AfterEffects:
https://vimeo.com/65830235
Wednesday, 22 May 2013
Compositing - field
To comp the field scene I built exactly the same tree as in the ruins scene. the only difference are the settings on the ColorCorrect nodes.
However, when I looked closely I was getting a shadow on the forest in the background. This happened because when I was modelling the ground plane in the beginning I had image plane on and ground continued behind it even though I couldn't see it. To fix it I could remodel the ground plane and rerender only the shadow pass or roto the shadow out. I chose roto. I added new node and rotoscoped the shadow.

I added Roto node just after the Read node with the shadow sequence.
I also added several more Constant nodes to enhance the shadow colors,
This is how the tree looked like in the end

Shadow Problem
I realized that my ground plane wasn't big enough to cast shadows at the beginning of the animation. So I had to add more stuff to it. Here it is how it looked before and after:
 Before
 After
After
I didn't add to much stuff as I needed to work quick in order to finish it before the deadline. I added just enough to make shadows believable.


I didn't add to much stuff as I needed to work quick in order to finish it before the deadline. I added just enough to make shadows believable.
Compositing - ruins
Once the animation was finished and rendered, it was the time to comp everything together.
To comp it I used Nuke.
First, I imported all of the renders and using ShuffleCopy node created new channels for each except the render with subsurface scattering passes. I comped them separately.

Then I added background sequence. I created the sequence in AfterEffects, as it gave me much quicker way of doing it. I just had to take into account the timing and when the fly sits on the bucket to synchronize it with the break. I used Copy node to still have an access to the channels I created earlier.

This is how the composition looked like at this point:

Then, using ColorCorrect and Merge nodes I added shadows, ambient occlusion and color corrected the fly.

This is result:

Once this was done I added subsurface scattering renders. I built new tree beside the old one and for this one instead of using ShuffleCopy nodes I used Merge nodes and set them to add. That will gave me the same result as the MasterBeauty. I also had to use specu;arity renders twice to strengthen the result.Once new tree was complete I merged it with the old one.

This is how it looked combined:

As you can see, I had huge premultiplication problem. The black outline got thicker and thicker with every new render.
To solve it I had to use Unpremult node after each sequence and change each sequence Color Space to Raw Data. With those changes the result was much better.

I had similar problem with shadows. I was getting white outline around them. This is because I used Multiply mode when merging them together. Once I changed the mode to Screen, the outline disappeared. but the shadow was bright, so I had to use Constant node with very dark color to fix that problem.
Lastly I added wing specularity. For some reason it didn't render with the other passes, so I had to create a separate render layer and render it on its own. Then I merged it exactly as I merged the subsurface scattering tree.

And here it is how it looked like:

Finally, I added ColorLookup node at the end of the tree to give everything more film look.

And this is the final result of the composition:

To comp it I used Nuke.
First, I imported all of the renders and using ShuffleCopy node created new channels for each except the render with subsurface scattering passes. I comped them separately.

Then I added background sequence. I created the sequence in AfterEffects, as it gave me much quicker way of doing it. I just had to take into account the timing and when the fly sits on the bucket to synchronize it with the break. I used Copy node to still have an access to the channels I created earlier.

This is how the composition looked like at this point:
Then, using ColorCorrect and Merge nodes I added shadows, ambient occlusion and color corrected the fly.

This is result:

Once this was done I added subsurface scattering renders. I built new tree beside the old one and for this one instead of using ShuffleCopy nodes I used Merge nodes and set them to add. That will gave me the same result as the MasterBeauty. I also had to use specu;arity renders twice to strengthen the result.Once new tree was complete I merged it with the old one.

This is how it looked combined:

As you can see, I had huge premultiplication problem. The black outline got thicker and thicker with every new render.
To solve it I had to use Unpremult node after each sequence and change each sequence Color Space to Raw Data. With those changes the result was much better.

I had similar problem with shadows. I was getting white outline around them. This is because I used Multiply mode when merging them together. Once I changed the mode to Screen, the outline disappeared. but the shadow was bright, so I had to use Constant node with very dark color to fix that problem.
Lastly I added wing specularity. For some reason it didn't render with the other passes, so I had to create a separate render layer and render it on its own. Then I merged it exactly as I merged the subsurface scattering tree.

And here it is how it looked like:

Finally, I added ColorLookup node at the end of the tree to give everything more film look.

And this is the final result of the composition:

Monday, 20 May 2013
Animation - field
Next shot was much simpler to animate. I divided it into three sections:
1. Fly in
2. Turn around
3. Fly off
Once the old background broke and new one was revealed the fly was confused and wants to check what's going on.
In the fly in section I animated it looking around in confusion. Once the fly lands I added a lot of bend into the legs to show the weight of the character.
For the turn around I used the exactly same method as in the turn around in the previous shot. This time it was even easier, because the fly didn't have to crouch on six legs.
The fly off was very similar to the fly off in the previous shot. But this time the fly was happy and calm. For starters I added a lot of anticipation before the take off. As the creature flies into the distance I scaled it down instead of moving it in Z axis.
Animation - ruins
I started animation with the ruins scene. First I blocked out the poses of walk cycle. The main poses were already there as I used them to create the storyboard and the animatic. The walk was quite challenging as I have never animated any four legged creatures before. But by observing animals I figured out how they move their limbs and animation process was quite straight forward. I also made a head turn to show that thy fly has noticed something. Here is a playblast:
Then, I made the fly to turn around looking for something. This was even more challenging because I made it crouch on six legs. However, it wasn't a walk cycle anymore and I could play with different approaches. Here is a playblast of my best result:
After that I animated fly walking towards the bucket and punching it. The walk was all right. I used exactly the same technique as in the beginning. The punch in the animatic, in my opinion, was to exaggerated, so I made it more subtle. However, I didn't like the outcome. I also animated background visibility. Once the fly punched the bucket it disappears, because when the background breaks I don't want any shadows.
I didn't like the punch, so I went to speak with my tutor and he advised that the punch is not necessary at all and doesn't even fit with the character. He suggested to try something else. So I made thy fly sit on the bucket instead. And it worked much better.
Lastly, I animated the fly flying away. The flight isn't smooth as I wanted to make it fill dizzy and panicked. Thy fly goes off the screen, so the background and lighting can change and I won't have any issues with the character.
Wednesday, 24 April 2013
Animatic
Once the storyboard was complete, I moved the key frames around in Maya and created the animatic. By making the animatic I could focus just on timing of the whole animation without worry about animation principles and other stuff. To make the animatic to work I had to add few more poses, because once I moved the key frames around, the Fly was flipping in between the keys. Once everything was cleaned up I focused on animating the background. I've done it in After Effects and I took the time to make it look good as I'm going to use it in the final animation.
Tuesday, 16 April 2013
Storyboard
Now it was the time to work on a story. It was quite difficult to think of a way to transfer from one environment to another, but in the end I thought of a way to do it.
The animation will start in the ruins. The character will enter the shot and will be looking for something. Can't find it. Gets angry and hits the pail. By hitting the pail the whole background breaks like a mirror. The fly is scared and flies off the screen while the background is collapsing revealing new fresh background. The fly is landing in the new environment. It looks happy and flies away into the distance.
I decided to make the storyboard in Maya. That way I can set key on every pose, which will help me in animation process.
As for the background, I had to create it in Photoshop. First I found an image of a broken mirror.

Then I added a cut and resized image of the background for each broken piece. Every piece is on a separate layer, so they all can fall in a realistic way.

And here is the final storyboard:

Motion Blur
In the meantime, I noticed that my early tests of the fly movement don't have any motion blur. Especially when the wings are flapping.
Therefore I decided to make a motion blur test.
To make this process as quick as possible I created a motion vector render layer and used it in Nuke to create motion blur.
I played around with different values of the blur and it's there except the wings.
I think the problem is because the wings are to far apart between every frame.
So I decided to make a motion blur in Maya.
It took four times longer than a regular render, but the result was good.
Then I did a test on the final scene and see how long are the render times.
Rendering on my machine was definitely too long and the whole 30 second animation wouldn't render in time for the deadline.

I have two options to speed up the render times. Use the render farm or change the light setting.
Sunday, 14 April 2013
Setting Up the Scene Render Layers
First of all, I built the ground geometry for the shadow and ambient occlusion layer. For the ruins scene it was quite challenging as I had to model not only the ground, but also the back wall and all bigger stones and pails on the ground. It wasn't necessary to model every single stone, because the shadow will be blurred and won't be completely black.

For the field scene it was much simpler. I could create only one nurbs plane and model it to align with the image. There was one difficulty though. It was hard to make sure the depth is accurate, so I went to the location and spend good couple of hour there trying to remember the topography of the area.

While solving render layers problems before, I created them and they were working. To save time and make sure they will work again, I didn't create new scene but imported everything to the working scene and just added stuff I need for each render layer.
So in the end I had eight render layers plus master beauty.

Monday, 11 February 2013
Fixing the Problems
The subsurface scattering material doesn't render with passes. To overcome the problem I had to separate it to five different sss materials: diffuse, front scattering, mid scattering, back scattering and specular. Then using colour buffers I was able to connect them to the custom render passes.
Here is a picture of the hypershade tree:

It worked very well. I was able to render out all of the pieces in one layer with all the passes I need.
To fix the wing specularity I simply had to add the wings to a different render layer.

Here is a picture of the hypershade tree:

It worked very well. I was able to render out all of the pieces in one layer with all the passes I need.

To fix the wing specularity I simply had to add the wings to a different render layer.

Problems
While making the test composites, I found out couple of problems. The first and the biggest one is that the subsurface scattering is not rendering with render passes and it came out black.
The second problem is that the rainbow texture in the wing didn't render. So the next step is to fix those problems.
The second problem is that the rainbow texture in the wing didn't render. So the next step is to fix those problems.
Environment test
Then I quickly created four new scenes using the HDRs I created before. I created all necessary render layers to make realistic composite and rendered it. In Nuke I put everything together to see which environment is the most suitable for the Fly. Also making those tests already gave me necessary Nuke tree to work for the final piece.
Here are four environment test:


Obviously those are just the tests and they not look as realistic as I would like the final piece to look like. They all need more tweaking to them but it gave me very strong visual idea how the Fly will look in different environments.
Here are four environment test:


Obviously those are just the tests and they not look as realistic as I would like the final piece to look like. They all need more tweaking to them but it gave me very strong visual idea how the Fly will look in different environments.
Texturing
I've chosen this design:

Having the UV layout allowed me to use exactly the same textures I used in the design. But it left seams in areas where I cut the mesh to lay the UVs. To get rid of the seams I used BodyPaint3d. It has a Clone tool which allowed me to quickly paint the seams out.
Here are few examples of the texture maps:


Above pieces are just for the shiny parts of the body. I used Blinns for them. For the fleshy bits, like the trumpet, I used subsurface scattering. I wanted them to look soft.
The wings are transparent Blinn with a rainbow texture applied to the specularity.
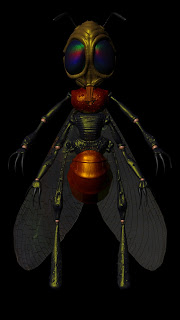
Here is a turntable of the complete textured Fly:

Having the UV layout allowed me to use exactly the same textures I used in the design. But it left seams in areas where I cut the mesh to lay the UVs. To get rid of the seams I used BodyPaint3d. It has a Clone tool which allowed me to quickly paint the seams out.
Here are few examples of the texture maps:


Above pieces are just for the shiny parts of the body. I used Blinns for them. For the fleshy bits, like the trumpet, I used subsurface scattering. I wanted them to look soft.
The wings are transparent Blinn with a rainbow texture applied to the specularity.
Here is a turntable of the complete textured Fly:
Tuesday, 15 January 2013
Look Development
I was still at the stage where I didn't know the colours and textures of my character. To quickly decide how it will look, I made three renders and and made 7 different textures in 2D using Photoshop.
Here are the three renders:


To make these renders I used simple Blinn materials where I changed the overall colour and the specular colour. I could render the character using only grey colour as I did in the last render but having some variety in colour will give me more ideas when working in Photoshop.
In Photoshop the only change I did to the renders was the change oh hue. This quickly gave me a lot more of colour examples. Then I could browse my texture library and quickly add it on top of the render changing different blending options.
Here are 7 designs that could lead me somewhere with this character:


I'm going to choose one design and create a 3D texture for it and then test it in different environments.
Saturday, 12 January 2013
HDRIs
In the meantime I went around different locations thinking about the environment for the character. I was planning when the model and the textures will be finished I will compose the Fly into those environments and see which one works the best. I experimented with different day times and with indoor and outdoor environments.
So I went to four locations:
1. Field
 A photograph for the composition.

2. Forest
 A photograph for the composition.


So I went to four locations:
1. Field


An HDRI of the field area.


An HDRI of the forest area.
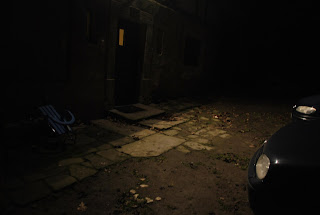
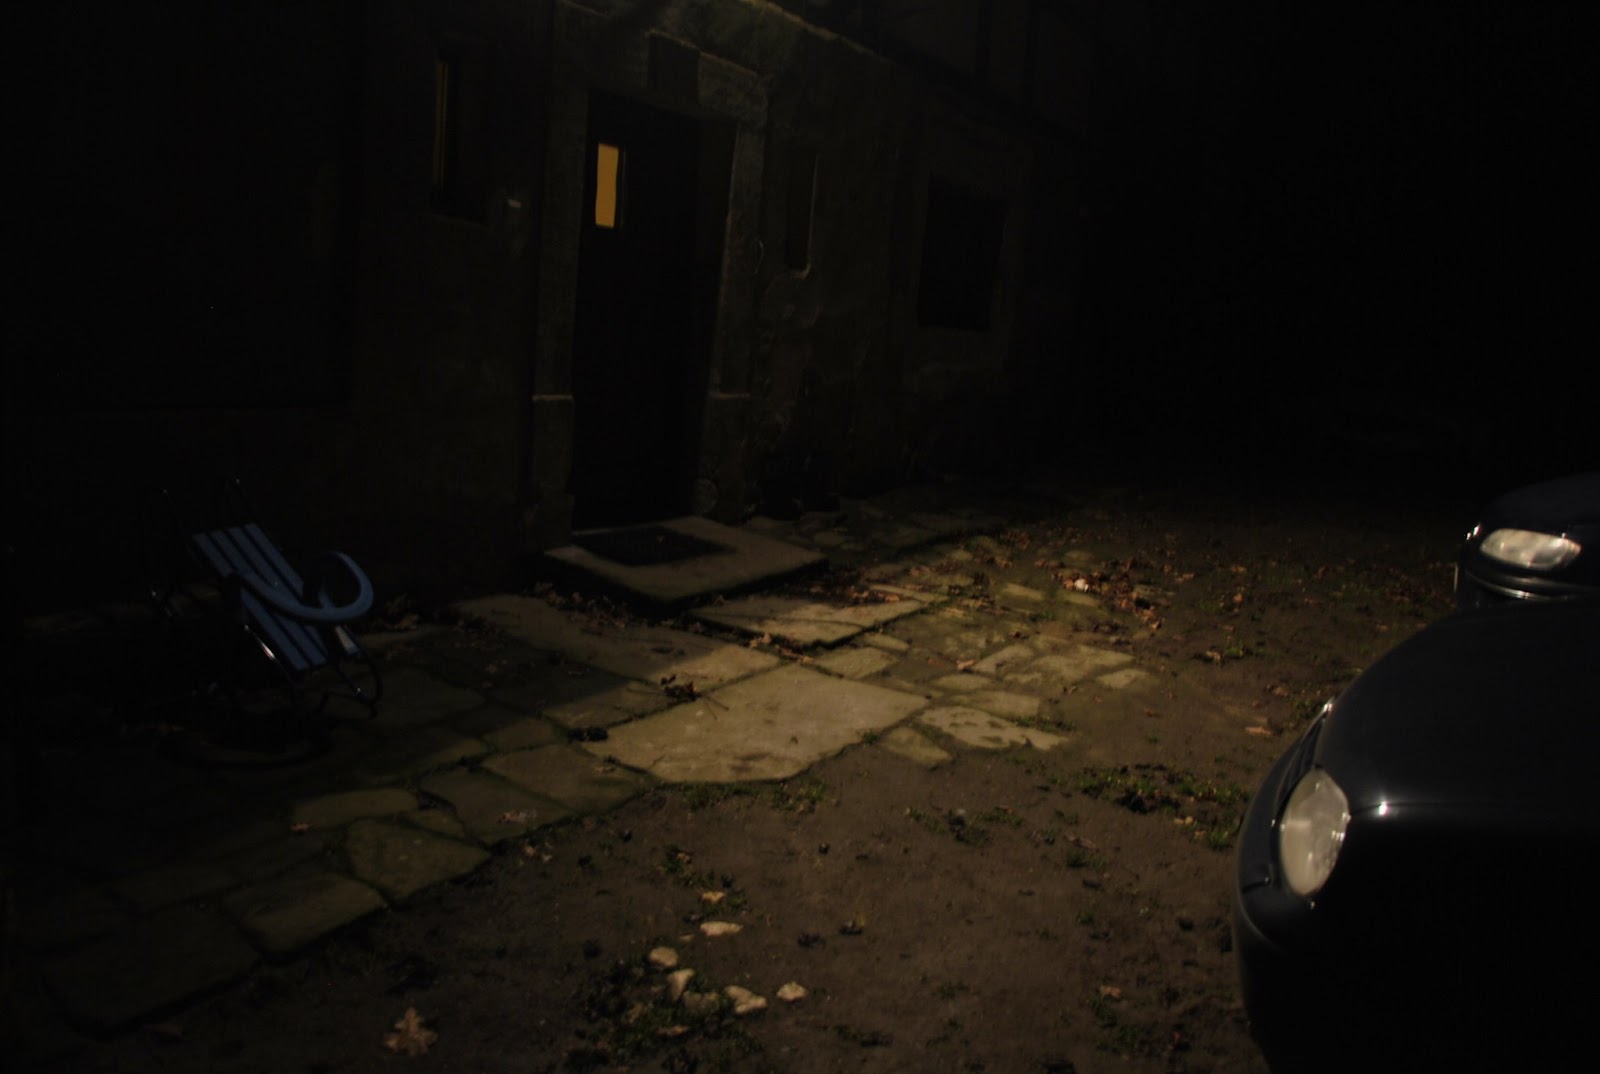
3. Ruins

A photograph for the composition.

An HDRI of the ruins area.
4. Garden
A photograph for the composition.

An HDRI of the garden area.
Subscribe to:
Posts (Atom)