Tuesday 15 January 2013

Look Development

I was still at the stage where I didn't know the colours and textures of my character. To quickly decide how it will look, I made three renders and and made 7 different textures in 2D using Photoshop.

Here are the three renders:


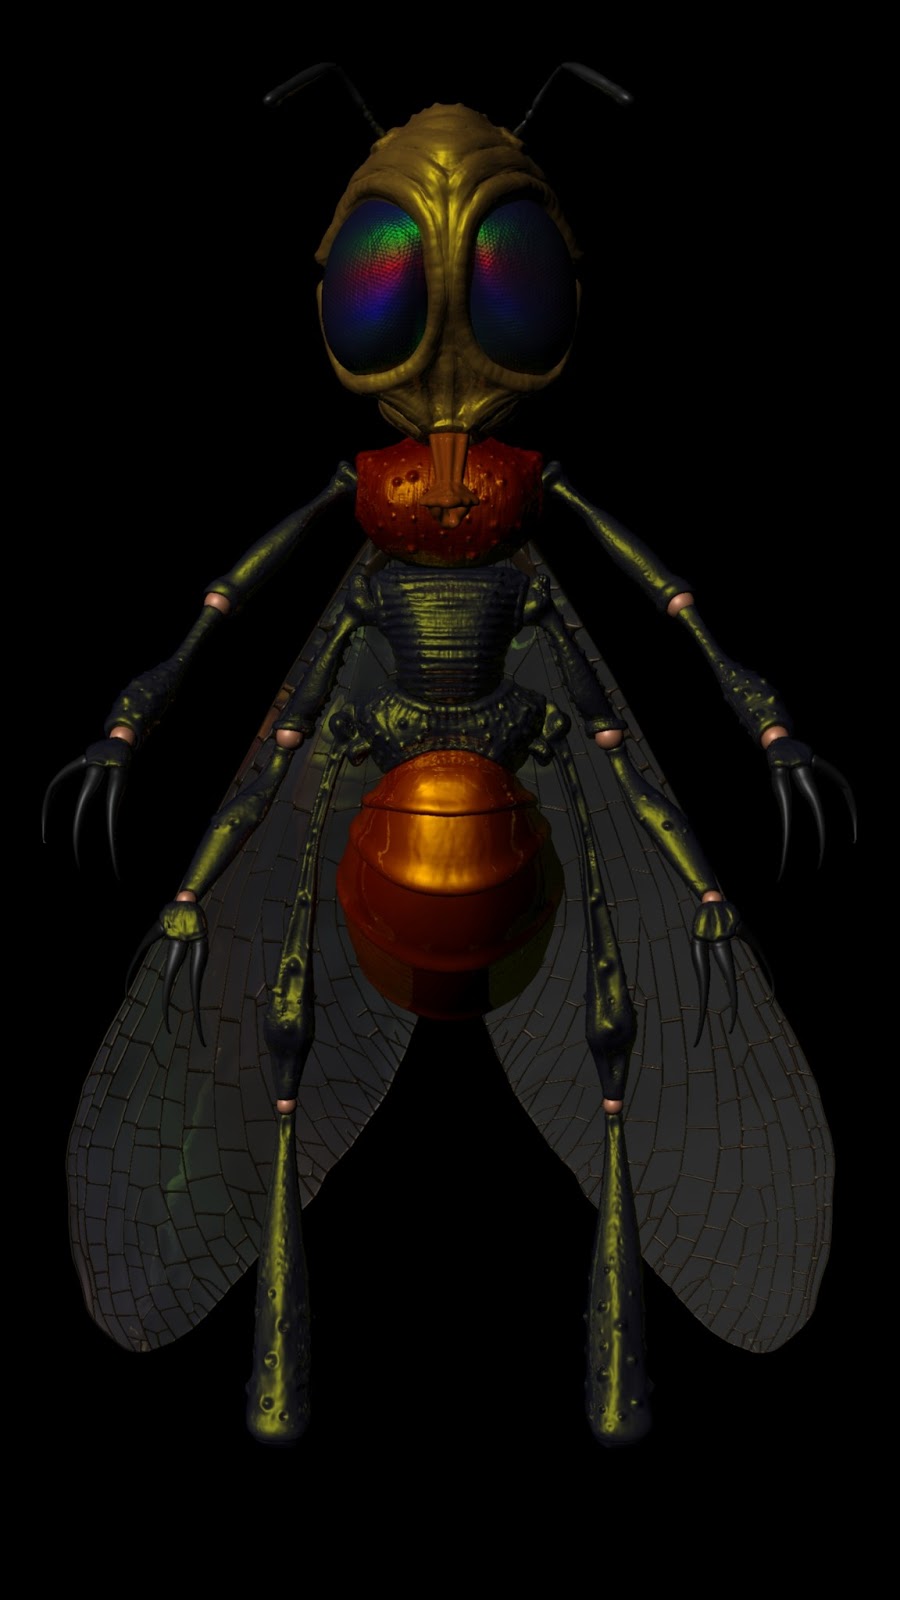
To make these renders I used simple Blinn materials where I changed the overall colour and the specular colour. I could render the character using only grey colour as I did in the last render but having some variety in colour will give me more ideas when working in Photoshop.

In Photoshop the only change I did to the renders was the change oh hue. This quickly gave me a lot more of colour examples. Then I could browse my texture library and quickly add it on top of the render changing  different blending options.

Here are 7 designs that could lead me somewhere with this character:


I'm going to choose one design and create a 3D texture for it and then test it in different environments.

Saturday 12 January 2013

HDRIs

In the meantime I went around different locations thinking about the environment for the character. I was planning when the model and the textures will be finished I will compose the Fly into those environments and see which one works the best. I experimented with different day times and with indoor and outdoor environments.

So I went to four locations:

1. Field

                                          A photograph for the composition.

An HDRI of the field area.


 2. Forest

                                                       A photograph for the composition.

                                          An HDRI of the forest area.

3. Ruins

                                          A photograph for the composition.

                                          An HDRI of the ruins area.

4. Garden

                                          A photograph for the composition.

                                          An HDRI of the garden area.


Final Model

I reversed the legs in Maya as the interface allows to do it much quicker than in Zbrush. However, to add more curvature to the head I went back to Zbrush.

Once the model was complete I thought it looks goofy with the legs reversed, but I knew, once it's rigged and quadruped, it will look much better.

Here is a turntable of the final model:


Pretending I'm The Client

Once I've done the renders, I looked at them and thought what can be changed.

The first thing that came to my mind was the legs. If the character is going to be quadruple, it will be extremely unnatural with the legs like that, so they needed to be reversed.

Another thing was the top view. The head looked too flat.

Other than that I was happy with the model. I went to Photoshop with the renders and made myself notes just as I was my client.


Zbrush

Now it was time to begin sculpting. The sculpting went really smoothly as I took a time and created an ordered base mesh. To show that the character is much bigger than a regular fly, I decided to give it a skin details. To achieve it I used ClayTubes brush. It leaves very nice texture while adding a volume at the same time. Based on the design the character is covered with bumps, so to get that effect I used Standerd brush with a round alpha. Changing the stroke to DragRect helped me to control the size of the bumps.

To get the insect-like eyes, I had to create my own alpha. I went to Maya and created a lot of spheres and they really look like the insect eye pattern.


Once I was happy with the model I rendered it from all angles in Zbrush to look at it and see what needs to be changed.


Wing

Before I went to Zbrush, I had a little thought about how to model the wings. In one of my previous projects, where I had to model similar wing, I used an alpha with the wing image. This time I was aiming to a more realistic look.

So firstly I did a little research on different insect wings. I came to a conclusion that fly wings have too little veins and they wouldn't be able to lift my character, which is about the size of a human. So I downloaded a wing with more veins for my reference.


By looking at this wing, I decided to make the veins separate to the actual wing. I went to Maya and from a simple cube I extruded all of the veins. Then, using Create Polygon tool, I drew the outline of the wing and inserted some edges so the topology matches the veins.


So the final mesh of the wing is really heavy and already has enough detail for a final character. So, I decided not to subdivided higher than level 2 in Zbrush and use Zbrush only to position it correctly on the character.