The subsurface scattering material doesn't render with passes. To overcome the problem I had to separate it to five different sss materials: diffuse, front scattering, mid scattering, back scattering and specular. Then using colour buffers I was able to connect them to the custom render passes.
Here is a picture of the hypershade tree:
It worked very well. I was able to render out all of the pieces in one layer with all the passes I need.
To fix the wing specularity I simply had to add the wings to a different render layer.
Monday, 11 February 2013
Problems
While making the test composites, I found out couple of problems. The first and the biggest one is that the subsurface scattering is not rendering with render passes and it came out black.
The second problem is that the rainbow texture in the wing didn't render. So the next step is to fix those problems.
Environment test
Then I quickly created four new scenes using the HDRs I created before. I created all necessary render layers to make realistic composite and rendered it. In Nuke I put everything together to see which environment is the most suitable for the Fly. Also making those tests already gave me necessary Nuke tree to work for the final piece.
Here are four environment test:
Obviously those are just the tests and they not look as realistic as I would like the final piece to look like. They all need more tweaking to them but it gave me very strong visual idea how the Fly will look in different environments.
Here are four environment test:
Obviously those are just the tests and they not look as realistic as I would like the final piece to look like. They all need more tweaking to them but it gave me very strong visual idea how the Fly will look in different environments.
Texturing
I've chosen this design:
Having the UV layout allowed me to use exactly the same textures I used in the design. But it left seams in areas where I cut the mesh to lay the UVs. To get rid of the seams I used BodyPaint3d. It has a Clone tool which allowed me to quickly paint the seams out.
Here are few examples of the texture maps:
Above pieces are just for the shiny parts of the body. I used Blinns for them. For the fleshy bits, like the trumpet, I used subsurface scattering. I wanted them to look soft.
The wings are transparent Blinn with a rainbow texture applied to the specularity.
Here is a turntable of the complete textured Fly:
Tuesday, 15 January 2013
Look Development
I was still at the stage where I didn't know the colours and textures of my character. To quickly decide how it will look, I made three renders and and made 7 different textures in 2D using Photoshop.
Here are the three renders:
To make these renders I used simple Blinn materials where I changed the overall colour and the specular colour. I could render the character using only grey colour as I did in the last render but having some variety in colour will give me more ideas when working in Photoshop.
In Photoshop the only change I did to the renders was the change oh hue. This quickly gave me a lot more of colour examples. Then I could browse my texture library and quickly add it on top of the render changing different blending options.
Here are 7 designs that could lead me somewhere with this character:
I'm going to choose one design and create a 3D texture for it and then test it in different environments.
Saturday, 12 January 2013
HDRIs
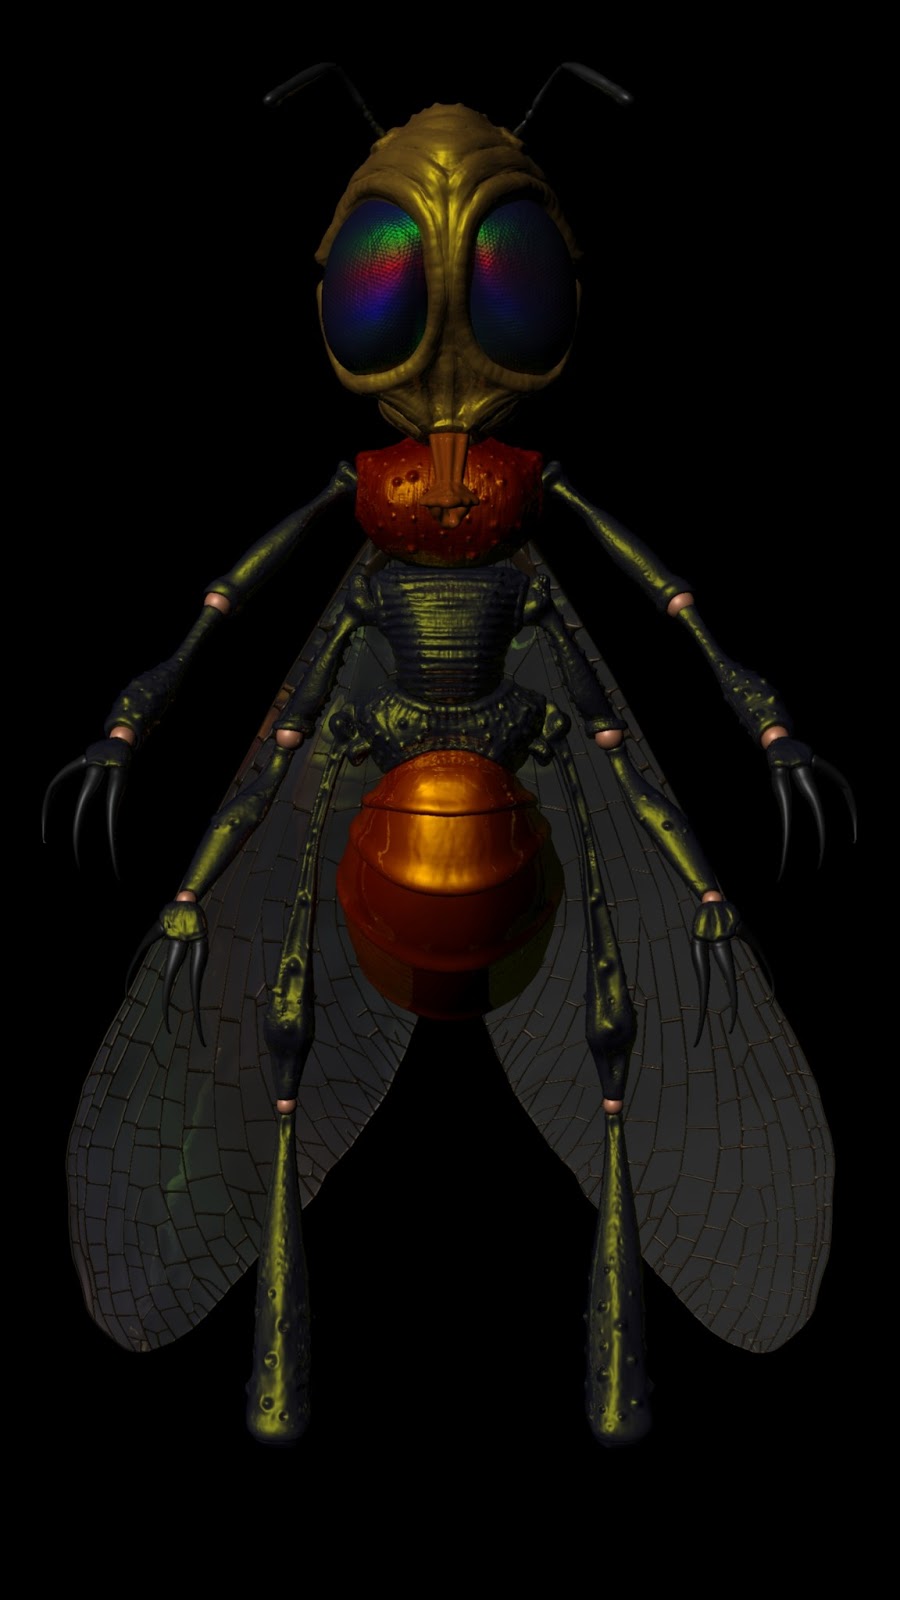
In the meantime I went around different locations thinking about the environment for the character. I was planning when the model and the textures will be finished I will compose the Fly into those environments and see which one works the best. I experimented with different day times and with indoor and outdoor environments.
So I went to four locations:
1. Field
A photograph for the composition.
2. Forest
A photograph for the composition.
So I went to four locations:
1. Field
A photograph for the composition.
An HDRI of the field area.
A photograph for the composition.
An HDRI of the forest area.
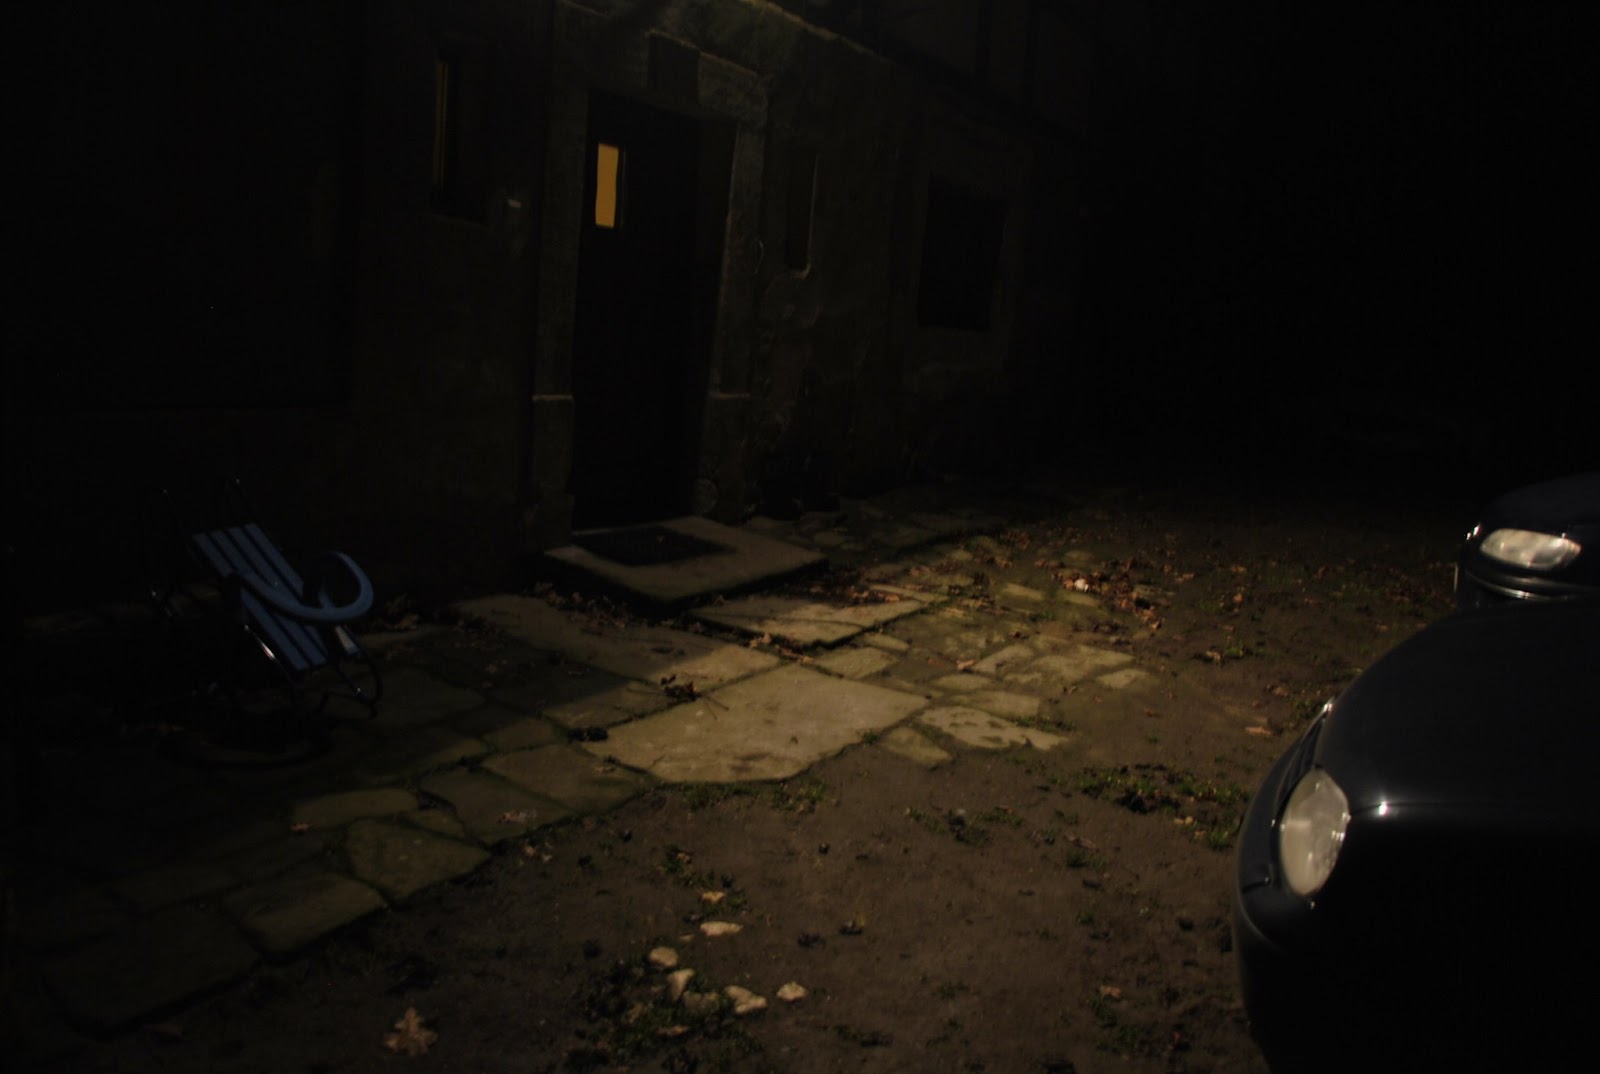
3. Ruins
A photograph for the composition.
An HDRI of the ruins area.
4. Garden
A photograph for the composition.
An HDRI of the garden area.
Final Model
I reversed the legs in Maya as the interface allows to do it much quicker than in Zbrush. However, to add more curvature to the head I went back to Zbrush.
Once the model was complete I thought it looks goofy with the legs reversed, but I knew, once it's rigged and quadruped, it will look much better.
Here is a turntable of the final model:
Once the model was complete I thought it looks goofy with the legs reversed, but I knew, once it's rigged and quadruped, it will look much better.
Here is a turntable of the final model:
Subscribe to:
Posts (Atom)